※本サイトは、Amazon アフィリエイト広告および Google Adsense 広告により収益を得ています。
目次
- Reality Composer Pro の Apple Vision Pro 用 3D モデル
- Amazon プライム感謝祭、ブラックフライデー先行セール、タイムセール 購入商品
- キオクシア KIOXIA 内蔵 SSD 2TB 、Qwiizlab Mac mini ドッキングステーション、UGREEN M.2 SSD 外付けケース、ORICO M.2 SSD 外付けケース
- Xbox ワイヤレス コントローラー
- 【ZUIKI】X68000 Z PRODUCT EDITION BLACK MODEL (スターターパック) と XEiJ (X68000 Emulator in Java)
近況
2024/04/04(Thu) 18:41:15
ブログを休んでいる間に、年も明けて4月上旬になってしまいましたが、この間、色々取り組んでいました。
2024/04/03(Wed) 20:40:23
Home - InvokeAI Documentation
https://invoke-ai.github.io/InvokeAI/

2024/04/03(Wed) 20:40:43
Overview - InvokeAI Documentation
https://invoke-ai.github.io/InvokeAI/installation/INSTALLATION/
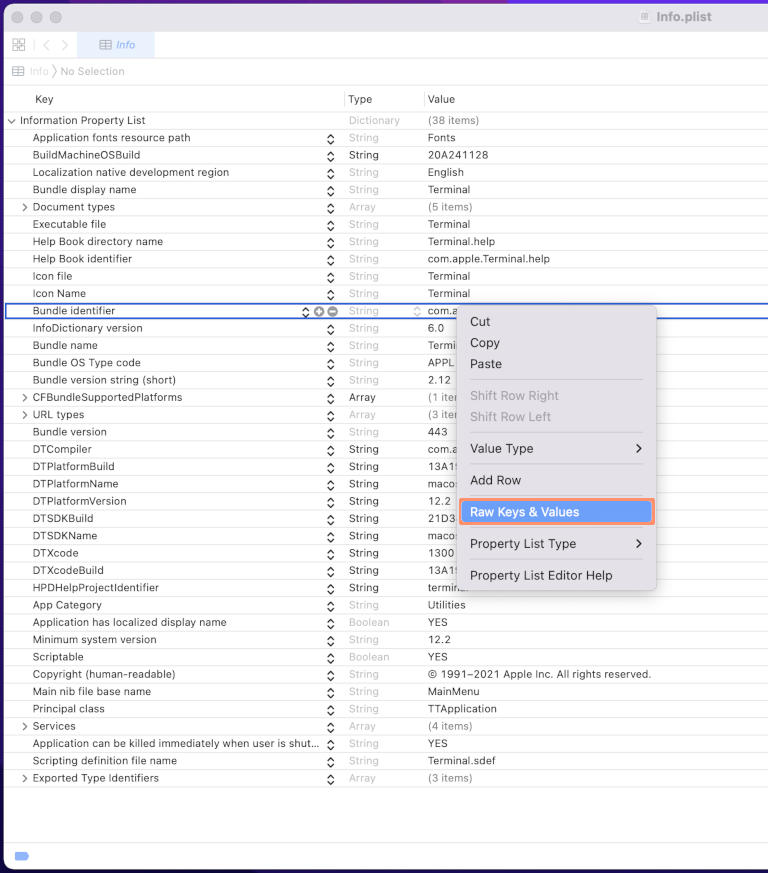
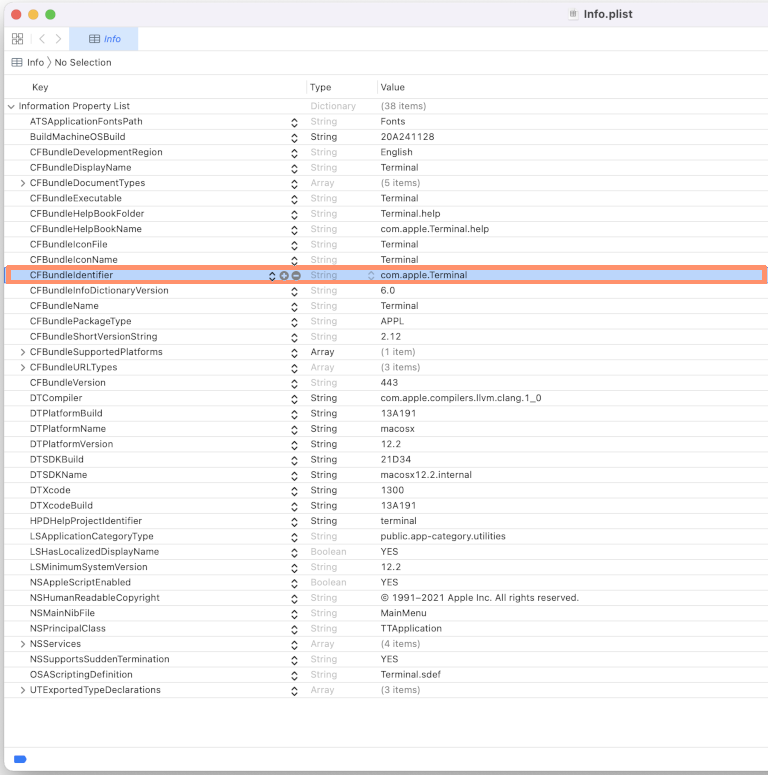
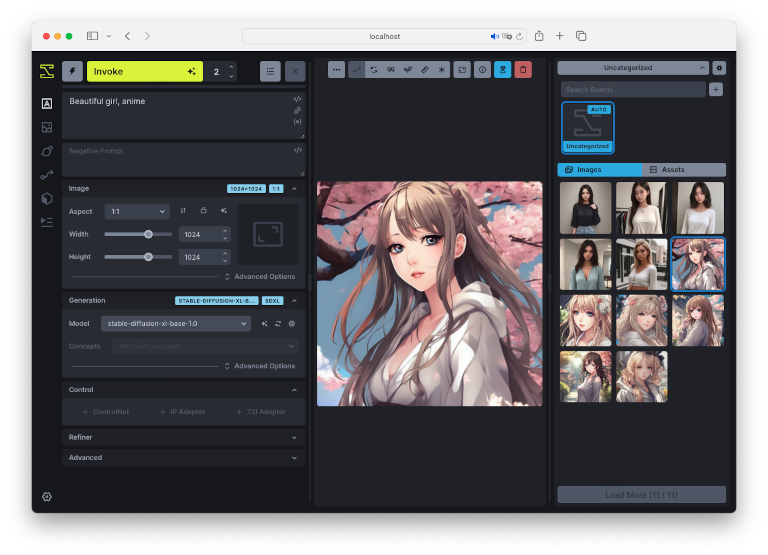
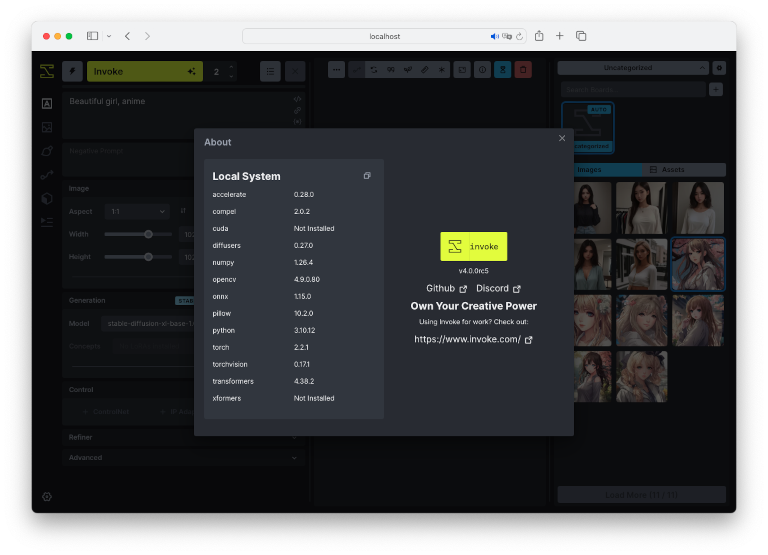
Appleシリコン Mac [ Apple M2 Proチップ搭載 Mac mini (2023) ] に、InvokeAI の Developer 版をインストールし、Stable Diffusion を試す方法をコツコツ書き溜めていました。ようやく完成したので公開しようと思ったら、大幅に変更が入って無駄になってしまいました。
没になった内容は、Homebrew の pyenv formulae を使って python 3.10.12 をインストールし、Python のインストーラー パッケージファイルから抜き出した Install Certificates.command ファイルを変更して、証明書を置き換えました。 InovekAI は、GitHub から Git コマンドで使ってダウンロードしました。また、node も nvm を使って node v20.10.0 をインストールしています。
サーバーを起動する AppleScript ファイルや Git コマンドを簡単に使用できる Ruby スクリプトなども作成したので、再利用して何とか記事にしたいのですが!
最新のInvokeAI を試したのですが、以前と比べてインストールも簡略化されています。
Reality Composer Pro の Apple Vision Pro 用 3D モデル
2024/03/02(Sat) 14:50:00
Apple Vision Proが登場 — Appleが開発した初の空間コンピュータ - Apple (日本)
https://www.apple.com/jp/newsroom/2023/06/introducing-apple-vision-pro/

2024/03/02(Sat) 14:50:42
Designing RealityKit content with Reality Composer Pro | Apple Developer Documentation
https://developer.apple.com/documentation/visionos/designing-realitykit-content-with-reality-composer-pro

▼Add assets to your project

Reality Composer Pro has a library of assets that you can use in your own apps. You can access the library by clicking the Add button (+) in the toolbar. Click the icon of the down-arrow inside a circle next to an asset to download the asset to Reality Composer Pro. When the download finishes, you can double-click or drag the asset into your project.
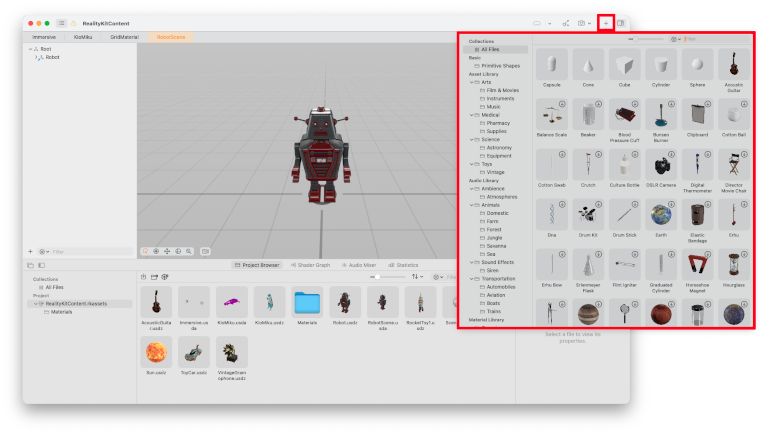
Apple Vision Pro が米国で発売されましたね!Reality Composer Pro には、Apple Vision Pro 用の 3D モデルが多数用意されているんですね。
2024/04/03(Wed) 20:44:11
Diorama | Apple Developer Documentation
https://developer.apple.com/documentation/visionos/diorama/

2024/04/03(Wed) 20:44:31
フリーのリグ付き初音ミクモデルデータ - Blender.jp
https://blender.jp/modules/news/index.php?page=article&storyid=2203
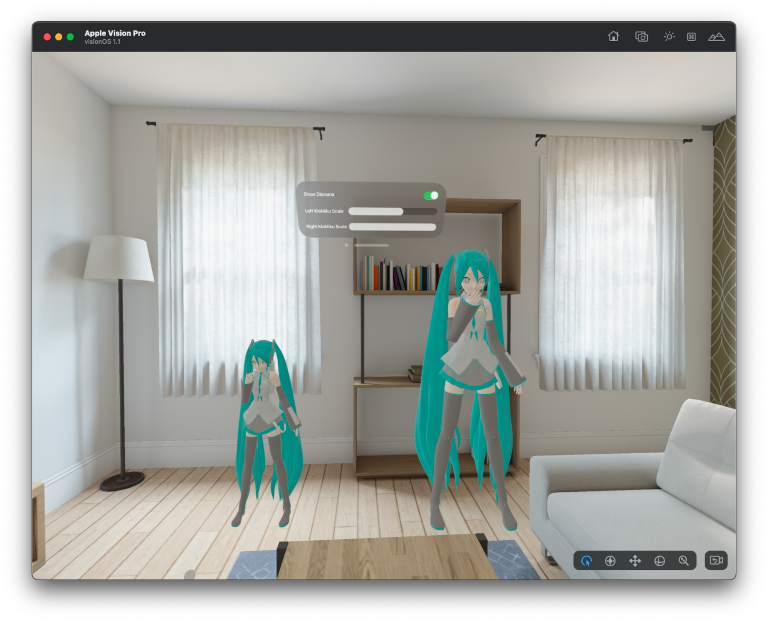
Dioramaのサンプルコードを参考に、フリーの初音ミク モデルデータを2体表示し、サイズ調整機能を備えたvisionOSアプリを作ってみました。VR/MRプログラミングは初めてだったため、基本を学ぶためにBlender を勉強中です。
Amazon プライム感謝祭、ブラックフライデー先行セール、タイムセール 購入商品
Amazon プライム感謝祭、ブラックフライデー先行セール、タイムセールで以下の商品を購入しました。
2023/10/14(Sat) 19:59:24 注文
2023/10/17(Tue) 15:02:00 到着
Amazon | 本, ファッション, 家電から食品まで | アマゾン
https://www.amazon.co.jp/ref=nav_logo

Qwiizlab Mac mini ドッキングステーション2.5インチSATA M.2 NVMe NGFF Displayport HDMI 8k@30Hz解像度 10Gbps高速伝送 (Mac Mini 2018/2020/2023対応)
販売: Qwiizlab
¥15,499
コンディション: 新品

2023/11/24(Fri) 11:23:06 注文
2023/11/26(Sun) 19:13:00 到着
Amazon | 本, ファッション, 家電から食品まで | アマゾン
https://www.amazon.co.jp/ref=nav_logo

UGREEN M.2 SSD 外付けケース
SATA NVME両対応 M.2 SSD ケース
USB3.2 Gen2接続 UASP対応
10Gbps高速転送 アルミ ssd m.2ヶ
ース 2230/2242/2260/2280 M
key/B+M key SSD対応 シリコンラ
バー付き【USB A-C&USB C-C 2本
ケーブル付き】
ベストセラー1位
カテゴリー:エン・・・
24%OFF
ブラックフライデー
価格 ¥2,498
過去価格:¥3,299
販売:
HONG KONG UGREEN LIMITED
2023/11/22(Wed) 13:40:00 注文
2023/11/23(Thu) 10:02:00 到着
Amazon | 本, ファッション, 家電から食品まで | アマゾン
https://www.amazon.co.jp/ref=nav_logo

キオクシア KIOXIA 内蔵 SSD
2TB NVMe M.2 Type 2280
PCle Gen 4.0x4(最大読込:7,300MB/s) 国産BiCS FLASH
TLC 搭載 5年保証 EXCERIA PRO SSD-CK2.0N4P/N 【国内正規代理店品】
15%OFF
ブラックフライデー先行セール
価格 ¥15,280 prime
過去価格:¥17,980
Amazon Japan G.K.から発送
販売元 バッファローダイレクト

商品の小計:		¥15,280
配送料・手数料:	¥0
合計:			¥15,280
ポイント利用:		-¥41
ご請求額:		¥15,239
獲得ポイント:		+306ポイント
>内訳
2023/12/24(Sun) 11:26:19 注文
2023/12/25(Mon) 11:43:00 到着
Amazon | 本, ファッション, 家電から食品まで | アマゾン
https://www.amazon.co.jp/ref=nav_logo

ORICO M.2 SSD 外付けケース M2 SSD ケース NVMe / SATA 両対応 USB3.2 Gen2接続 10Gbps高速転送 UASP対応 アルミケース ssd m.2 ケース 2230/2242/2260/2280 M key/B+M key SSD対応 M2PVM
ORICOのストアを表示
4.3 5つ星のうち4.3    2,641個の評価
Amazon
おすすめ
過去1か月で1000点以上購入されました
タイムセール
-25% ¥2,024 税込
過去価格: ¥2,699
ポイント: 20pt  (1%)  詳細はこちら

注文内容
商品の小計:	¥2,024
配送料・手数料:	¥0
合計:	¥2,024
ポイント利用:	-¥74
ご請求額:	¥1,950
獲得ポイント:
+20ポイント
内訳
2023/12/17(Sun) 08:42:02 注文
2023/12/18(Mon) 13:09:00 到着
・Amazon | 本, ファッション, 家電から食品まで | アマゾン
https://www.amazon.co.jp/ref=nav_logo

パナソニック(Panasonic) 【Amazon.co.jp限定】 パナソニック エネループ プロハイエンドモデル(大容量モデル) [最小容量2500mAh/くり返し回数150回] 単3形 充電池 4本パック eneloop pro BK-3HCD/4HA
パナソニック(Panasonic)のストアを表示
4.4 5つ星のうち4.4    216個の評価
¥2,247 税込
数量: 1
販売:アマゾンジャパン合同会社
22pt (1%)
家電PCアクセサリクーポンキャンペーン
家電・PCアクセサリークーポンキャンペーン
Amazon
おすすめ
過去1か月で3000点以上購入されました
翌日配送
ポイント: 22pt  (1%)  詳細はこちら

【純正品】Xbox ワイヤレス コントローラー (カーボン ブラック)
マイクロソフトのストアを表示
プラットフォーム : Xbox Series X | CEROレーティング: 全年齢対象
4.3 5つ星のうち4.3    5,344個の評価
ベストセラー1位 - カテゴリ Xbox Series X & S 用周辺機器・アクセサリ
過去1か月で3000点以上購入されました
-20% ¥5,173 税込
数量: 1
販売:アマゾンジャパン合同会社
52pt (1%)
参考価格: ¥6,480
翌日配送
ポイント: 52pt  (1%)  詳細はこちら

注文内容

商品の小計:	¥7,420
配送料・手数料:	¥0
合計:	¥7,420
ポイント利用:	-¥25
ご請求額:	¥7,395
獲得ポイント:
+74ポイント
内訳
キオクシア KIOXIA 内蔵 SSD 2TB 、Qwiizlab Mac mini ドッキングステーション、UGREEN M.2 SSD 外付けケース、ORICO M.2 SSD 外付けケース
キオクシア KIOXIA 内蔵 SSD 2TB を Qwiizlab Mac mini ドッキングステーション、UGREEN M.2 SSD 外付けケース、ORICO M.2 SSD 外付けケースそれぞれ装着して試しました。外部 SSD としてはどれも問題ないのですが、起動ディスクとして利用する場合には、macOS Sonoma 14.2.1 のインストールに失敗したり、起動しなかったりと不安定なため、使用は諦めました。
2024/03/16(Sat) 18:16:17
外付けのストレージデバイスを Mac の起動ディスクとして使用する - Apple サポート (日本)
https://support.apple.com/ja-jp/111336
後で気付いたのですが、上記サイトにあるように、外付けのストレージデバイスを Mac の起動ディスクとして使用する場合、Mac mini (2023) の背面ポートで一番左にある USB-C ポート以外の USB-C ポートを使用する必要があります。さらにネットで調べると起動ディスク作成には、Thunderbolt SSD ケースが必要なようです。
キオクシア KIOXIA 内蔵 SSD 2TB は、Qwiizlab Mac mini ドッキングステーションに装着して、2つのボリュームを作成しました。1つは Time Machine 用に 1TB に制限して使っています。
Xbox ワイヤレス コントローラー
2023/02/10(Fri) 08:28:45 購入
Mac App Store
BIOHAZARD VILLAGE
販売元
CAPCOM Co.,Ltd
サイズ
34.1GB
カテゴリ
アクション
¥5000

2023/12/07(Thu) 18:38:31 購入
Mac App Store
Stray
販売元
Annapurna Interactive
サイズ
8.16 GB
カテゴリ
アドベンチャー
¥4000

2024/01/24(Wed) 21:45:33 予約注文
2024年1月31日 リリース予定
Mac App Store
DEATH STRANDING DIRECTOR'S CUT
アクション
デベロッパ
505 Games (US), Inc.
¥3000
Mac Store にも、ゲームが揃って来ました。Nintendo Switch と Mac mini (2023) の間で Nintendo Switch Proコントローラーを再接続するのも面倒なので、【純正品】Xbox ワイヤレス コントローラー (カーボン ブラック) を購入しました。単3形電池 (エネループ) の向きを間違えて戸惑いましたが、Xbox ボタンを押せば Launchpad のゲームフォルダが開き、ゲームも簡単に起動できるので便利です。ただし、A、B ボタンの位置が逆なのは、なかなか慣れないですが!
【ZUIKI】X68000 Z PRODUCT EDITION BLACK MODEL (スターターパック) と XEiJ (X68000 Emulator in Java)
2023/06/09(Fri) 14:13:09 予約
2023/09/28(Thu) 10:30:00 到着
Amazon | 本, ファッション, 家電から食品まで | アマゾン
https://www.amazon.co.jp/ref=nav_logo

お届け予定日: 2023年9月29日 - 2023年9月30日
発送元: 瑞起直販(ZUIKI)
【ZUIKI】X68000 Z PRODUCT EDITION BLACK MODEL (スターターパック)
¥29,535
数量:
1
数量: 1
販売:瑞起直販(ZUIKI)
Amazonプライムの対象外です。(詳細)
ダブルポイント
ギフトオプションはありません

注文内容
商品の小計:	¥29,535
配送料・手数料:	¥0
合計:	¥29,535
ポイント利用:	-¥12
ご請求額:	¥29,523

2023/08/13(Sun) 12:56:05 予約
2023/09/29(Fri) 10:29:00 到着

Amazon | 本, ファッション, 家電から食品まで | アマゾン
https://www.amazon.co.jp/ref=nav_logo

お届け予定日: 2023年9月29日 - 2023年9月30日
発送元: 瑞起直販(ZUIKI)
【ZUIKI】X68000 Z ACアダプター65W(USB-TypeC)
¥7,480
数量:
1
数量: 1
販売:瑞起直販(ZUIKI)
75pt (1%)
Amazonプライムの対象外です。(詳細)

注文内容
商品の小計:	¥7,480
配送料・手数料:	¥0
ご請求額:	¥7,480
獲得ポイント:
+75ポイント
内訳
2024/03/17(Sun) 22:15:05
ZUIKI STORE
https://store.zuiki.com/
2024/03/02(Sat) 15:06:36
ログイン - ZUIKI コミュニティ
https://dev.zuiki.com/project-z/community/login?redirect=/post/detail/211

2024/03/02(Sat) 15:07:08
XEiJ (X68000 Emulator in Java)
https://stdkmd.net/xeij/

2024/03/02(Sat) 15:07:29
激光電脳倶楽部 Vol.1~7 : 満開製作所 : Free Download, Borrow, and Streaming : Internet Archive
https://archive.org/details/gekiden1-7
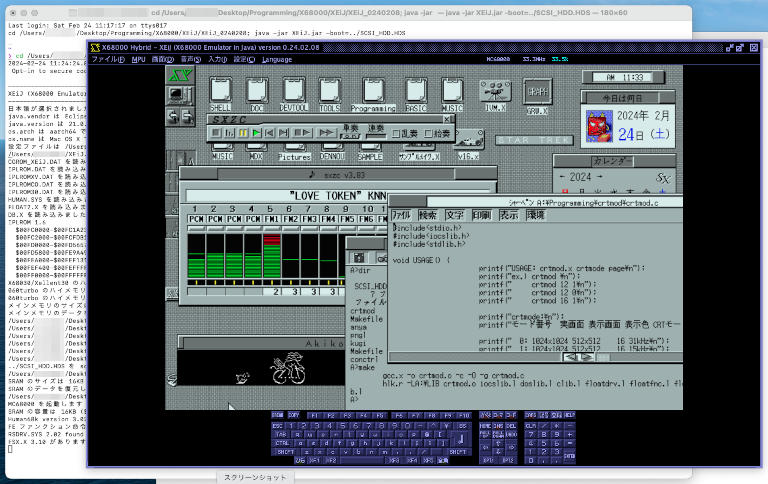
【ZUIKI】X68000 Z PRODUCT EDITION BLACK MODEL (スターターパック) が届きました。早速、Z CLUB で製品登録を行い、1GB の SCSI HDD イメージをダウンロードして、Mac mini (2023) 上の XEiJ (X68000 Emulator in Java) を使って、SCSI HDD イメージに SX-Window と XC 環境を構築しました。
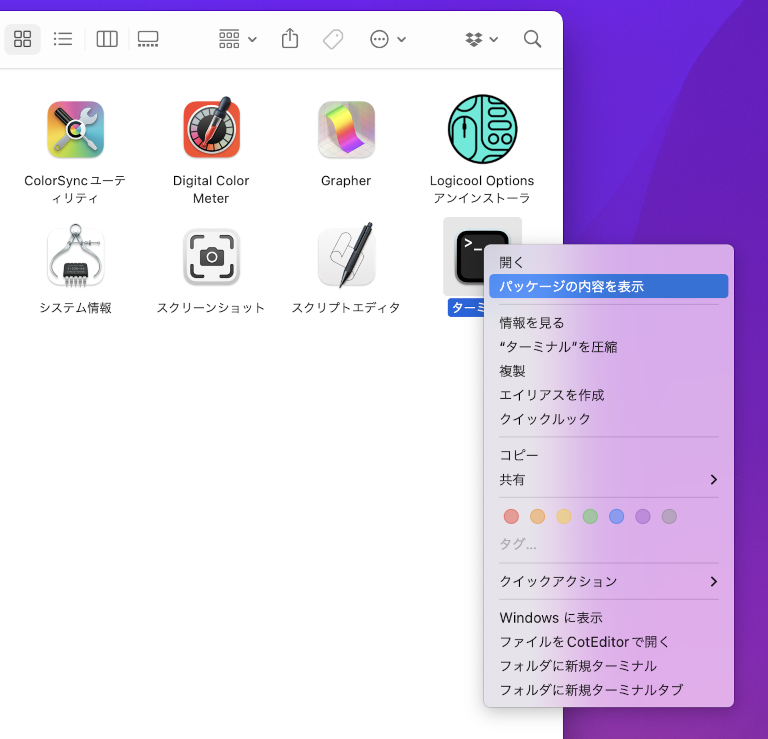
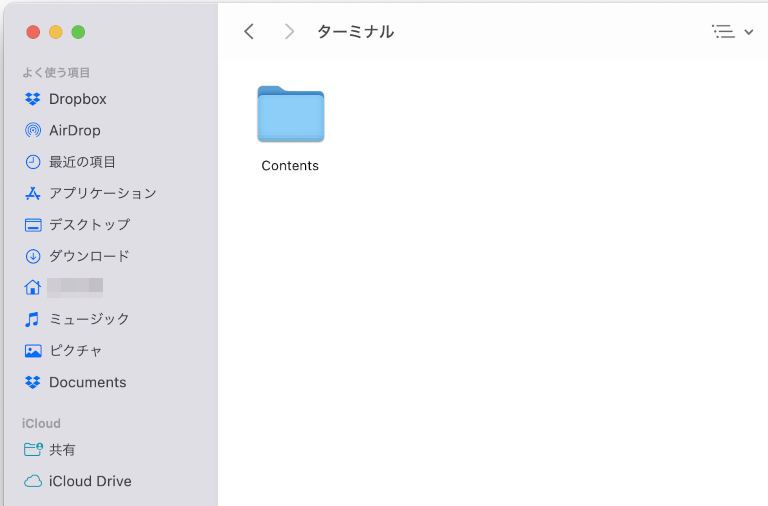
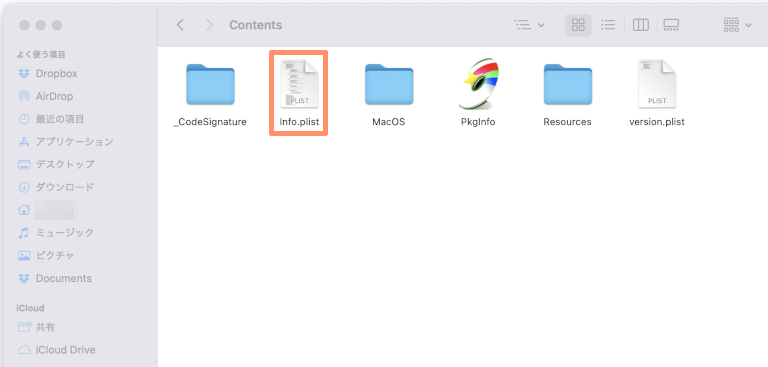
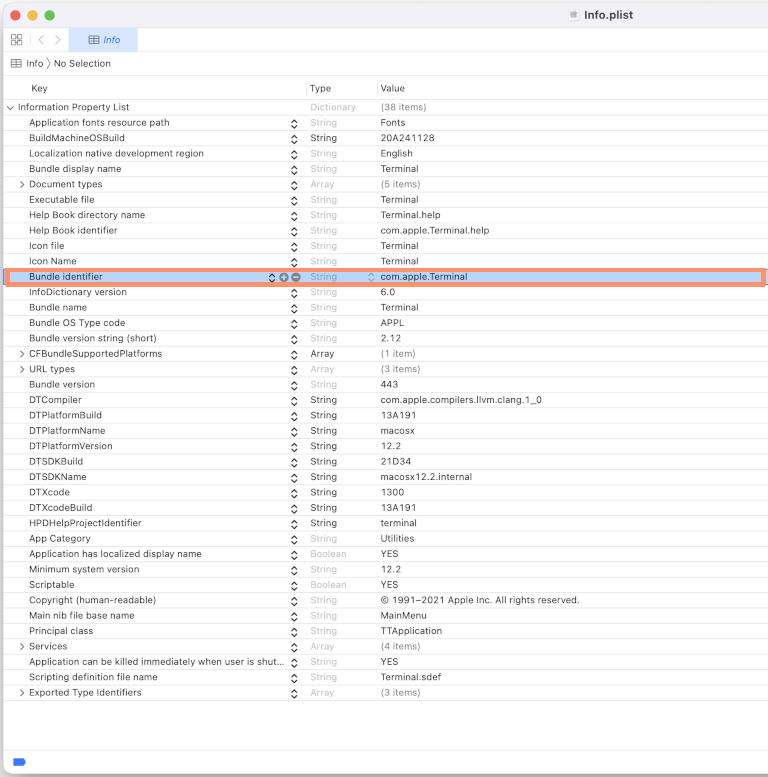
電脳倶楽部のデータをInternet Archive から ターミナルの curl コマンドを使ってダウンロードしました。YouTube で SX-Window、パソコンサンデーの動画を見ていると当時の自分の環境とは違って色々なことが出来るんですね!