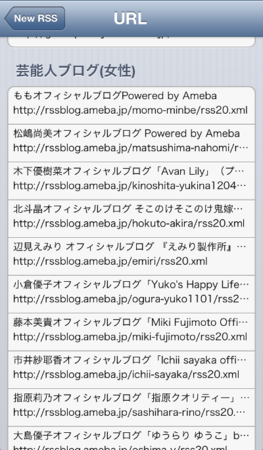
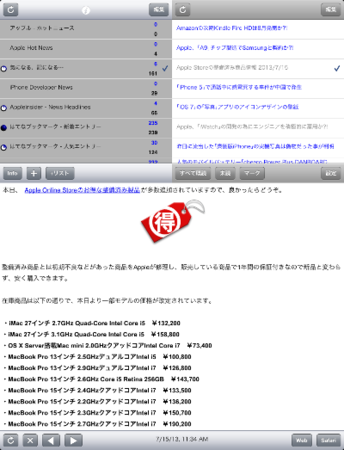
ちょっと宣伝です。拙作 RSS リーダー iYKRSS を iPhone 5 スクリーンで表示できるようにしました。また、iPad 版 RSS リーダー iYKRSSHD を Retina ディスプレイに対応しました。
あらかじめ登録された芸能人ブログリストから RSS フィードを簡単に選ぶことができるので、RSS リーダーを使ったことがない初心者にもお勧めです。
iYKRSS、iYKRSSHD 共に無料です。ただし、iYKRSSHD は、9月になると 85 円に戻ります。iPhone、iPod touch、iPad を持ってる人は、良かったら試しにダウンロードしてみてください。
使い方がわからない人は、気軽にコメントに書き込んでください。返事は、遅れるかもしれないのでご了承ください。
iYKRSS version 1.0.4
http://appstore.com/yoshiakikoyama/iykrss
iYKRSSHD version 1.0.2
http://appstore.com/yoshiakikoyama/iykrsshd
随分遅れましたが、前回、予告した iOS 用 Twitter アプリ作成方法を説明したいと思います。私自身、良く理解していない部分もあるので、間違いもあるかもしれません。
基本的に、下記 URL の REST API v1.1 を
REST API v1.1 Resources | Twitter Developers
https://dev.twitter.com/docs/api/1.1
使って Twitter のタイムライン情報などを取得します。REST API v1.1 を前回説明した GET、POST で送信するのですが、
Authorizing a request | Twitter Developers
https://dev.twitter.com/docs/auth/authorizing-request
上記、URL の
POST /1/statuses/update.json?include_entities=true HTTP/1.1
Accept: */*
Connection: close
User-Agent: OAuth gem v0.4.4
Content-Type: application/x-www-form-urlencoded
Authorization:
OAuth oauth_consumer_key="xvz1evFS4wEEPTGEFPHBog",
oauth_nonce="kYjzVBB8Y0ZFabxSWbWovY3uYSQ2pTgmZeNu2VS4cg",
oauth_signature="tnnArxj06cWHq44gCs1OSKk%2FjLY%3D",
oauth_signature_method="HMAC-SHA1",
oauth_timestamp="1318622958",
oauth_token="370773112-GmHxMAgYyLbNEtIKZeRNFsMKPR9EyMZeS9weJAEb",
oauth_version="1.0"
Content-Length: 76
Host: api.twitter.com
status=Hello%20Ladies%20%2b%20Gentlemen%2c%20a%20signed%20OAuth%20request%21
のように、認証情報 (上の Authorization: OAuth の部分) が必要です。OAuth を使って取得する必要があります。
しかし、iOS の場合、
 Using Reverse Auth | Twitter Developers
https://dev.twitter.com/docs/ios/using-reverse-auth
Reverse Auth を使って OAuth の情報を取得できます。取得の仕方は、
 seancook/TWReverseAuthExample · GitHub
https://github.com/seancook/TWReverseAuthExample
を参考にした拙作サンプル
自作 iOS 用 Twitter アプリ サンプル TSTwitter
http://kyoshiaki.sakura.ne.jp/osx/Sample/Twitter.zip
に含まれています。 KeyDefines.h の
#define TWITTER_CONSUMER_KEY    @""
#define TWITTER_CONSUMER_SECRET @""
を設定してください。Consumer key、Consumer secret を使うには、
Twitter Developers
https://dev.twitter.com/
にログインして、自分のアイコンをクリックして表示されるメニューから ‘My applications’ を選び、’Create a new application’ ボタンをクリックして My application を作成する必要があります。
Sign in with your Twitter account | Twitter Developers
https://dev.twitter.com/apps
作成した application を選べば、Consumer key、Consumer secret は表示されます。
自作 iOS 用 Twitter アプリ サンプル TSTwitter
http://kyoshiaki.sakura.ne.jp/osx/Sample/Twitter.zip
の TSViewController.m の Reverse Auth を呼び出している部分は、
TSViewController.m
- (void)awakeFromNib {
__unsafe_unretained TSViewController *me = self;
_accountStore = [[ACAccountStore alloc] init];
_apiManager = [[TWAPIManager alloc] init];
ACAccountType *twitterType = [_accountStore accountTypeWithAccountTypeIdentifier:ACAccountTypeIdentifierTwitter];
_accounts = [_accountStore accountsWithAccountType:twitterType];
_account = [_accounts objectAtIndex:0];
NSLog(@"%@", _account);
NSLog(@"identifier: %@", _account.identifier);
NSLog(@"username: %@", _account.username);
if ([TWITTER_CONSUMER_KEY isEqualToString:@""]) {
NSLog(@"TWITTER_CONSUMER_KEY=\"\"");
[self requestApiTimeline:self];
//        [self requestApi:me];
} else {
[_apiManager performReverseAuthForAccount:_account withHandler:^(NSData *responseData, NSError *error) {
if (responseData) {
NSString *responseStr = [[NSString alloc] initWithData:responseData encoding:NSUTF8StringEncoding];
NSArray *parts = [responseStr componentsSeparatedByString:@"&"];
me.reverseAuth = [NSMutableDictionary dictionary];
//            NSLog(@"%@", responseStr);
for (NSString *line in parts) {
NSArray *array = [line componentsSeparatedByString:@"="];
[me.reverseAuth setObject:array[1] forKey:array[0]];
}
//            NSLog(@"%@", me.reverseAuth);
//
[me requestApi:me];
//                [me requestRawApi:me];
}
}];
}
}
[_apiManager performReverseAuthForAccount:_account withHandler:^(NSData *responseData, NSError *error) { です。
_apiManager に引数、ACAccount *account と最終的に呼ばれるブロックを渡し、performReverseAuthForAccount: withHandler: メソッドを呼ぶと
Using Reverse Auth | Twitter Developers
https://dev.twitter.com/docs/ios/using-reverse-auth
の最後にある下部
oauth_token=2311112785-EXKeLV5ezo3HHIaIf1T3ffeww0mR5dfYXKZjjRy0&oauth_token_secret=KYxxxxx3U4Fxrxva3BGD92--12ehEzFwQ&user_id=38895958&screen_name=theseancook
のような、oauth_token、oauth_token_secret、user_id、screen_name を NSData *responseData で返してくれます。ここで重要なのは、user_id を返してくれることです。実は、Reverse Auth を使わなくても、タイムラインを表示することができます。
    if ([TWITTER_CONSUMER_KEY isEqualToString:@""]) {
NSLog(@"TWITTER_CONSUMER_KEY=\"\"");
[self requestApiTimeline:self];
//        [self requestApi:me];
上の部分が TWITTER_CONSUMER_KEY が設定されていない場合、Reverse Auth を使わないでタイムラインを表示しています。
ただし、他の REST API v1.1 を使用するためには user_id が必要になってきます。
後は、簡単です。アップルが用意したフレームワークの SLReuest を使って Twitter API v1.1 を呼び出す汎用 API が
- (void)performTwitterRequestAccount:(ACAccount *)account Method:(SLRequestMethod)method URL:(NSURL *)url parameters:(NSDictionary *)dict completion:(TwitterRequestHandler)completion
です。
- (void)requestApi:(id)sender {
//    url = [NSURL URLWithString:@"http://192.168.1.6:9090/1.1/lists/list.json"];
url = [NSURL URLWithString:@"https://api.twitter.com/1.1/lists/list.json"];
//    dict = @{@"user_id" : @"00000000"}; // user_id を設定してください
dict = @{@"user_id" : [self.reverseAuth objectForKey:@"user_id"]}; // TWITTER_CONSUMER_KEY を設定していないと使えません。
[self performTwitterRequestAccount:_account Method:SLRequestMethodGET URL:url parameters:dict completion:^(NSArray *json, NSURLResponse *response, NSError *error) {
NSLog(@"===< List >===");
//      NSLog(@"%@", json);
for (NSDictionary *list in json) {
NSString *text = [NSString stringWithFormat:@"<%@>\n  list_id:%@\n  slug:%@",[list  objectForKey:@"uri"],[list  objectForKey:@"id"],[list  objectForKey:@"slug"]];
NSLog(@"%@", text);
}
}];
で、- (void)performTwitterRequestAccount:(ACAccount *)account Method:(SLRequestMethod)method URL:(NSURL *)url parameters:(NSDictionary *)dict completion:(TwitterRequestHandler)completion を呼び出しているのがわかると思います。この場合、自分のリストを表示しています。
url = [NSURL URLWithString:@"http://192.168.1.6:9090/1.1/lists/list.json"];
を有効にして、前回の GET、POST のように SLRequest がどんなデータをサーバーに送信しているのか確認することができます。
まず、ターミナルで
自作 iOS 用 Twitter アプリ サンプル TSTwitter
http://kyoshiaki.sakura.ne.jp/osx/Sample/Twitter.zip
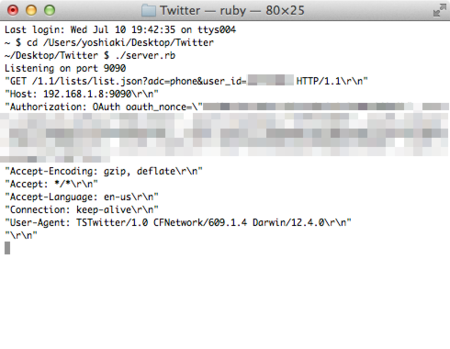
に含まれる server.rb を実行します。その後、TSTwitter.xcodeproj を開き、ツールバー上 Run ボタンをクリックします。画面が現れプログラムが起動し終えたら、Stop ボタンを押します。ターミナル上に実際の SLRequst がサーバーに送るデータが下図のように表示されます。
上図より、
Authorizing a request | Twitter Developers
https://dev.twitter.com/docs/auth/authorizing-request
上記 URL の
POST /1/statuses/update.json?include_entities=true HTTP/1.1
Accept: */*
Connection: close
User-Agent: OAuth gem v0.4.4
Content-Type: application/x-www-form-urlencoded
Authorization:
OAuth oauth_consumer_key="xvz1evFS4wEEPTGEFPHBog",
oauth_nonce="kYjzVBB8Y0ZFabxSWbWovY3uYSQ2pTgmZeNu2VS4cg",
oauth_signature="tnnArxj06cWHq44gCs1OSKk%2FjLY%3D",
oauth_signature_method="HMAC-SHA1",
oauth_timestamp="1318622958",
oauth_token="370773112-GmHxMAgYyLbNEtIKZeRNFsMKPR9EyMZeS9weJAEb",
oauth_version="1.0"
Content-Length: 76
Host: api.twitter.com
status=Hello%20Ladies%20%2b%20Gentlemen%2c%20a%20signed%20OAuth%20request%21
と似ているのが理解できると思います。SLRequest を使わずに NSMutableURLRequest で実現したのが
自作 iOS 用 Twitter アプリ サンプル TSTwitter
http://kyoshiaki.sakura.ne.jp/osx/Sample/Twitter.zip
に含まれているソース
TSSignedRequest.h
TSSignedRequest.m
の TSSignedRequest
- (void)performTSTwitterRequestMethod:(TSSignedRequestMethod)method URL:(NSURL *)url parameters:(NSDictionary *)dict completion:(TSTwitterRequestHandler)completion {
- (void)requestRawApi:(id)sender {
- (void)performTSTwitterRequestMethod:(TSSignedRequestMethod)method URL:(NSURL *)url parameters:(NSDictionary *)dict completion:(TSTwitterRequestHandler)completion {
です。SLRequest と似ているので注意してください。TSSignedRequest を通常使う必要はありません。Twitter API の動作を確認するために、実験的に作ってみただけです。SLRequest を使ってください。
SLRequest を使うだけなら、Reverse Auth が必要ないと思うかもしれません。以前は ACAccount *account から user_id を取り出すことができたのですが、現在、Reverse Auth を使って user_id を取り出すしか方法がありません。
Twitter API v1.1 を試すには、Mac App Store の Twitter、ターミナル上で curl を使う方法があります。
Mac 上で動作する本家 Twitter アプリは、Mac App Store にあります。
Twitter
http://appstore.com/mac/twitterinc/twitter
上記 URL をクリックすれば表示されます。
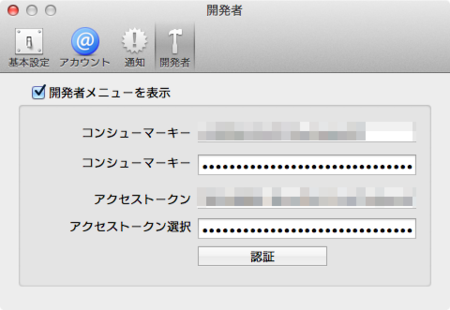
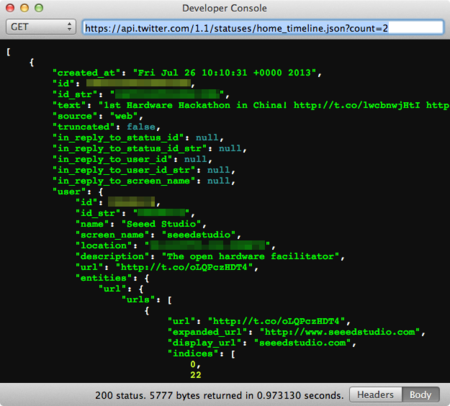
Twitter をクリックして実行し、メニュー/Twitter/環境設定… を選び、ツールバーから ‘開発者’ を選択します。コンシュマーキー、アクセストークンを入力し、認証ボタンをクリックすると開発者メニューが有効になります。
試しに、メニュー/開発/コンソール を選び、ホームタイムラインを表示してみたのが下図です。
curl を使って試す方法は、まず、
Twitter Developers
https://dev.twitter.com/
にログインします。
REST API v1.1 Resources | Twitter Developers
https://dev.twitter.com/docs/api/1.1
を開き、呼びたい REST Api をクリックします。ここでは、GET statuses/home_timeline にします。
右側、OAuth tool で ‘Select one of your Apps’ から自分のアプリケーションを選びます。その後、Generate OAuth signature ボタンをクリックします。
表示されたページの Request URI: が正しく設定されているか確かめます。 Request query: に設定したいパラメーターを入力します。ここでは、count=2 と入力します。
この後、ページの一番下の See Oauth signature for this request ボタンをクリックします。
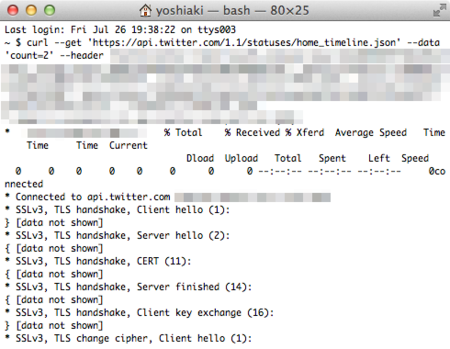
表示されたページの OAuth Signing Results に cURL command と名前の項目があります。右横にパラメーターがセットされた curl コマンドが表示されています。それをコピーして、ターミナルにペーストし実行すれば、生の JSON データを取得することができます。

